Configure Access Control
CryspIQ® uses Microsoft Entra ID security groups to protect enterprise data and ensure users only have access to information relevant to their role.
This guide explains how to configure security groups and assign them within CryspIQ® to manage access to data.
Before You Start
Before configuring access control, ensure:
- Microsoft Entra ID is available within your organisation.
- The required users have been created in Microsoft Entra ID.
- Security groups have been designed and approved.
- You have Company Administrator or Data Administrator access within CryspIQ®.
Access Control determines what data a user can see.
Functional Roles determine what features a user can access.
These are configured separately within CryspIQ®.
Understanding Access Control
CryspIQ® secures enterprise data using Microsoft Entra ID security groups.
Users are assigned to one or more security groups and access is granted based on those group memberships.
Examples include:
| Business Function | Example Security Group |
|---|---|
| Finance | FINANCE_USERS |
| Human Resources | HR_USERS |
| Operations | OPERATIONS_USERS |
| Executive Team | EXECUTIVE_USERS |
| Data Administrators | DATA_ADMINISTRATORS |
This approach allows access to be managed centrally through Microsoft Entra ID.
Navigate to Access Control
From the main menu, go to:
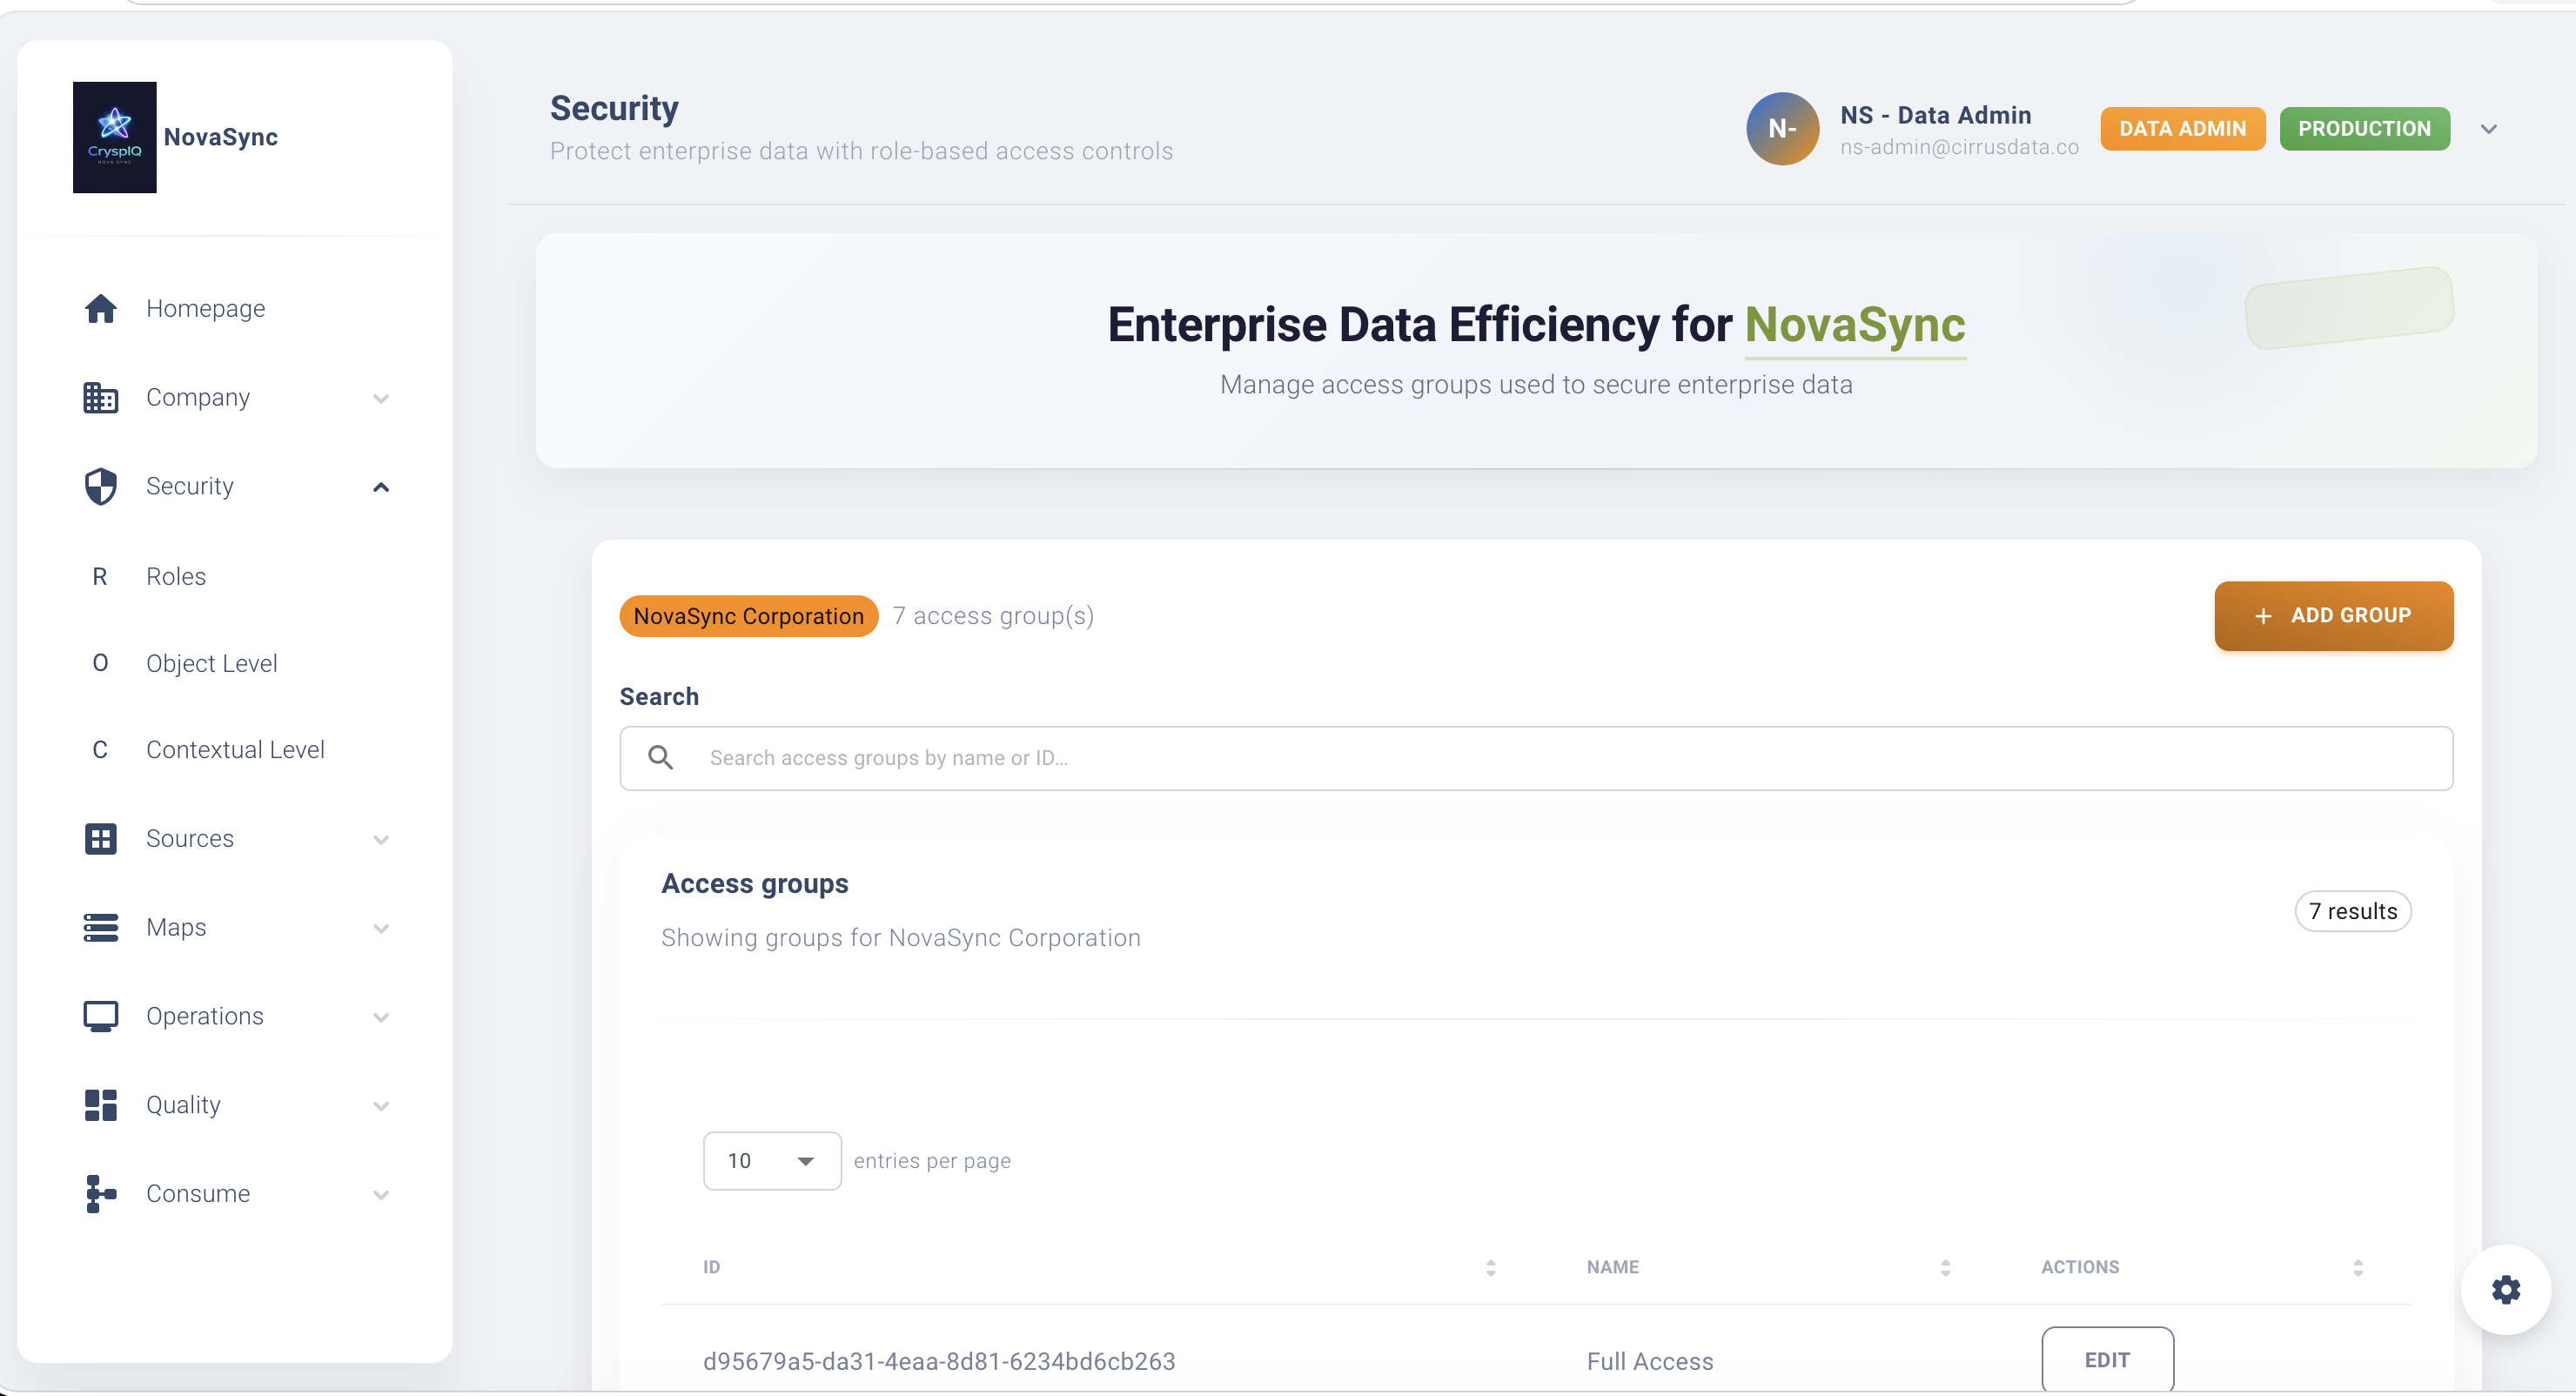
Security → Access Control
The Access Control page displays all security groups currently configured within CryspIQ®.
Create a Security Group in Microsoft Entra ID
Security groups are created and maintained within Microsoft Entra ID.
- Sign in to the Microsoft Entra Admin Centre.
- Navigate to Groups.
- Select New Group.
- Choose Security Group.
- Enter a meaningful group name.
- Add the required users.
- Save the group.
Example
FINANCE_USERS
Use business-oriented group names that clearly identify the purpose of the group.
Add a Security Group to CryspIQ®
Once the security group exists in Microsoft Entra ID:
- Open Security → Access Control.
- Select Add Security Group.
- Search for the Microsoft Entra ID group.
- Select the required group.
- Save the configuration.
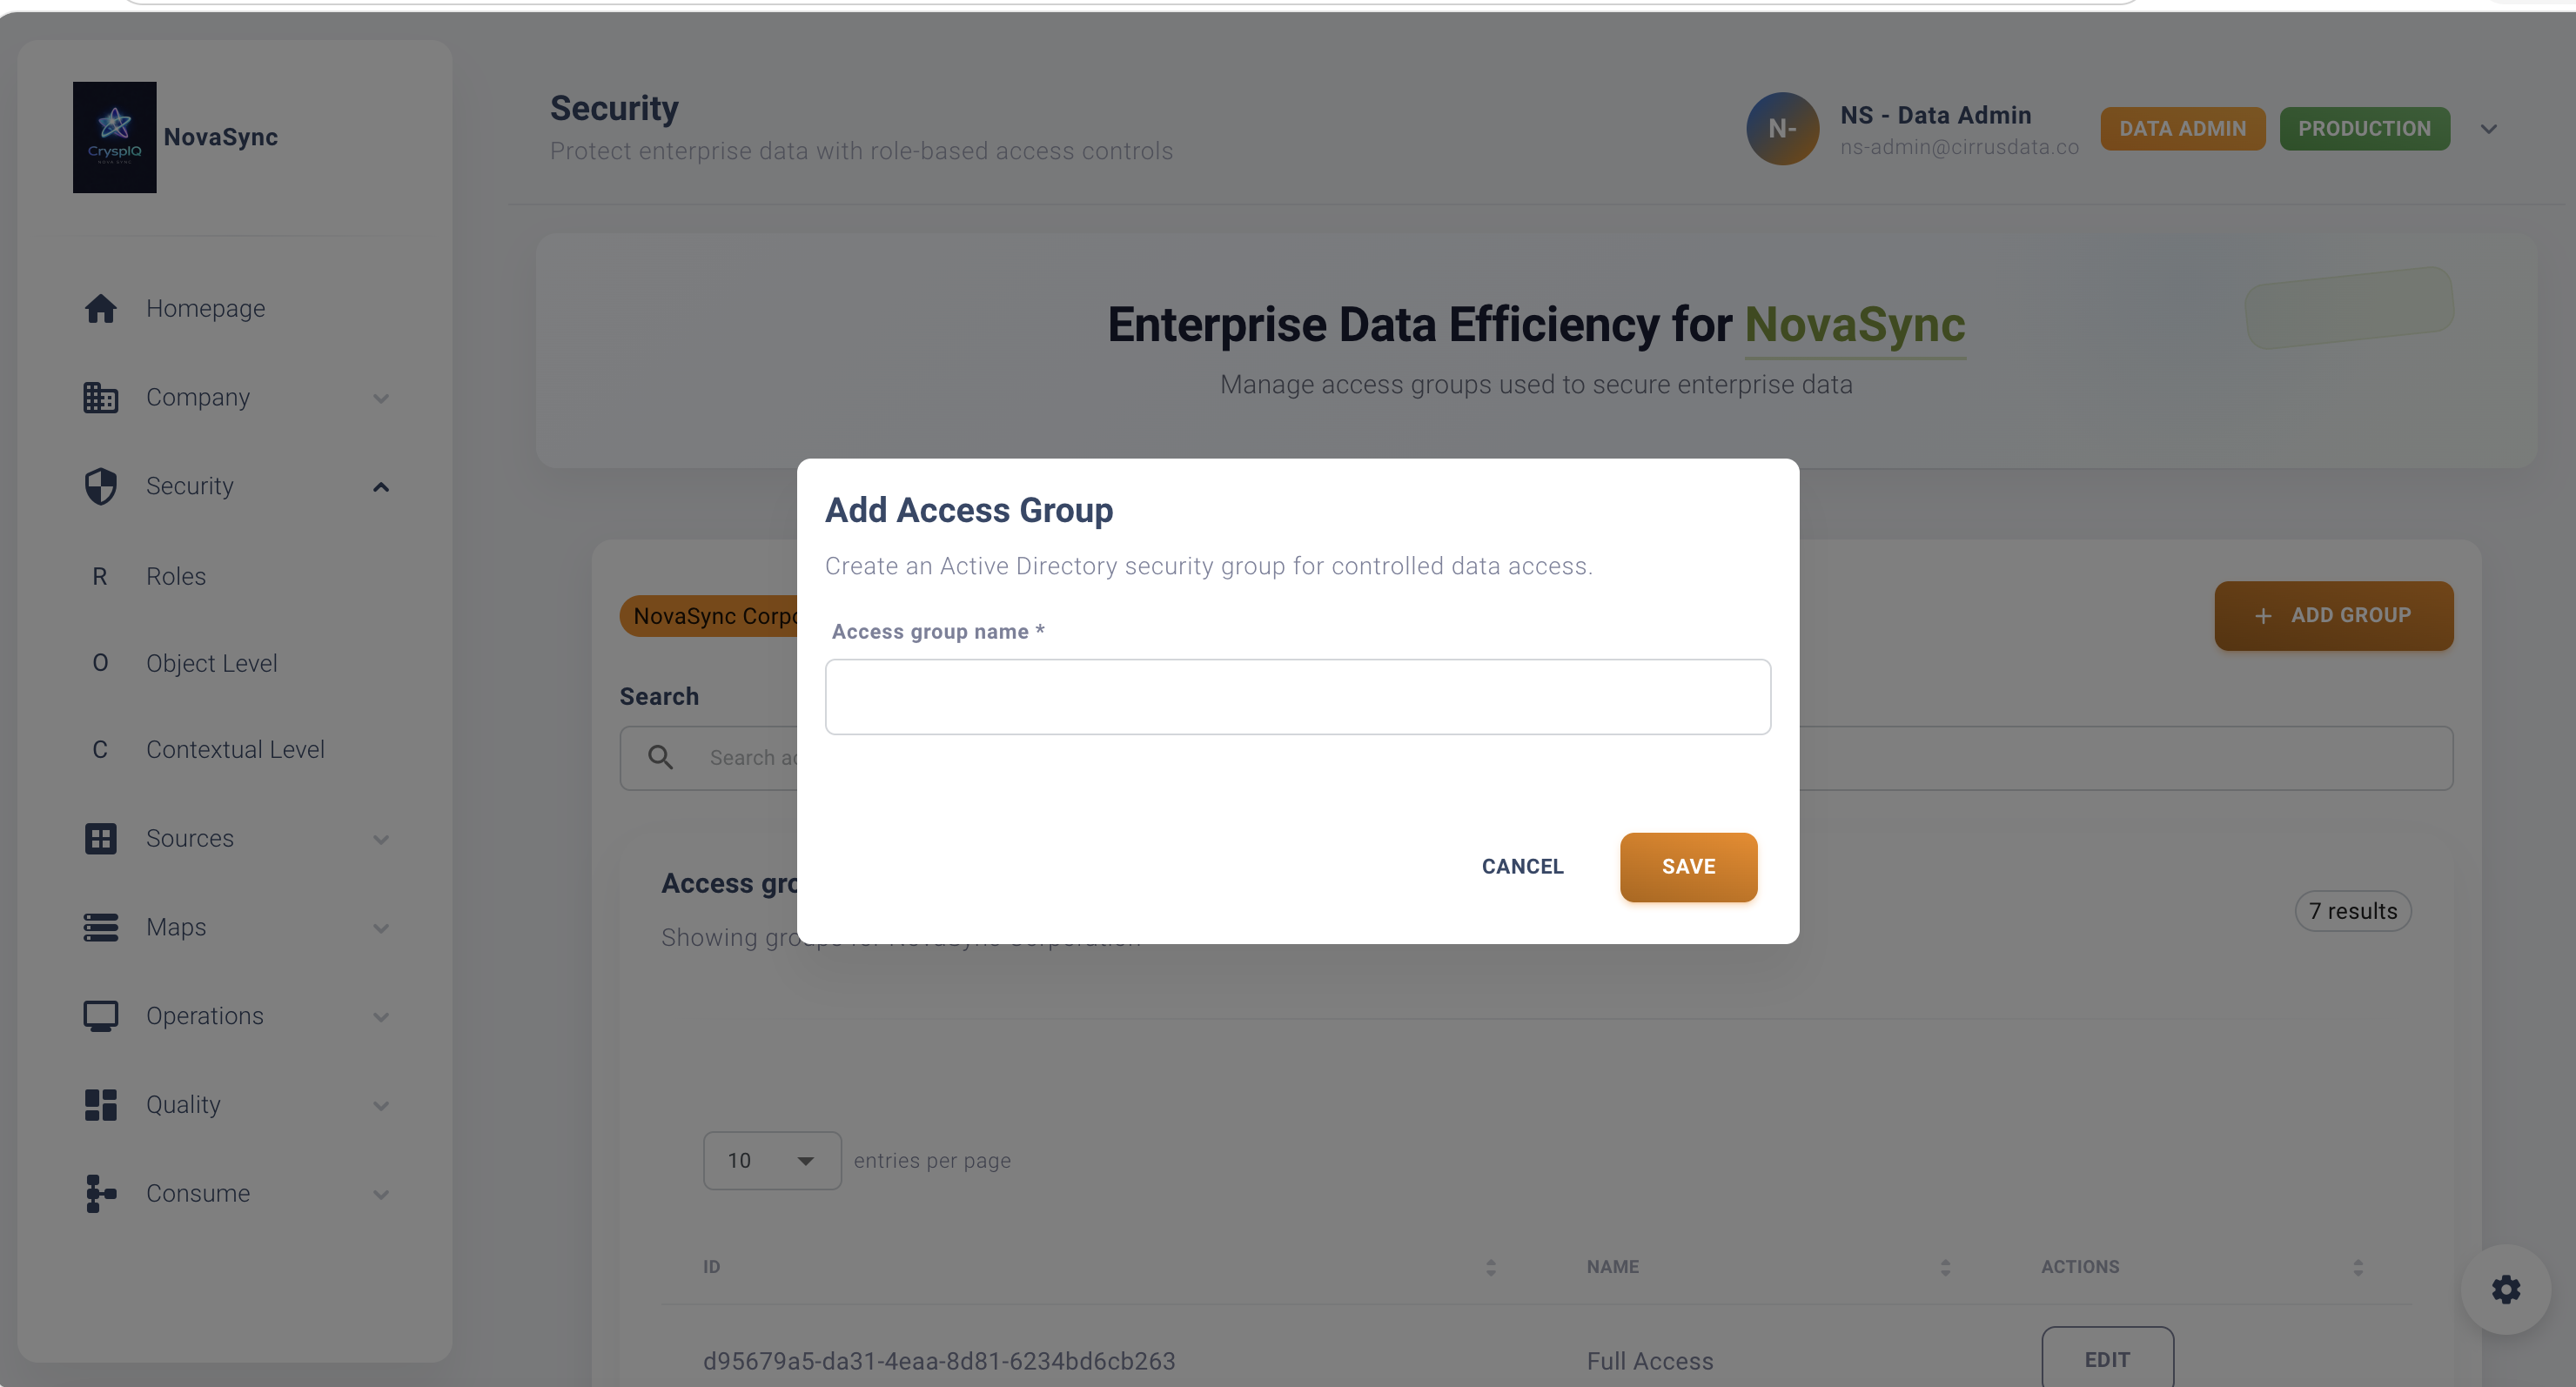
The security group is now available for use throughout CryspIQ®.
Assign Data Access
After a security group has been added, it can be assigned to specific data assets.
Examples include:
- Business Objects
- Facts
- Dimensions
- Contextual Security Rules
- Data Domains
Only users belonging to the assigned security group will be able to access the protected data.
Example Security Model
Finance Team
| Security Group | Access |
|---|---|
| FINANCE_USERS | Finance facts, reports and KPIs |
| FINANCE_MANAGERS | Finance reporting and management metrics |
| CFO_USERS | Executive reporting and strategic metrics |
Operations Team
| Security Group | Access |
|---|---|
| OPERATIONS_USERS | Operational reporting |
| OPERATIONS_MANAGERS | Operational reporting and management KPIs |
This structure allows security to be managed at a business level rather than individually for each user.
Review Security Group Membership
To review access:
- Open Security → Access Control.
- Select the security group.
- Review assigned users.
- Review assigned data permissions.
Regular reviews help ensure users only have access to information required for their role.
Security Best Practices
Use Business-Based Groups
Create groups that represent business functions.
Good examples:
FINANCE_USERS
OPERATIONS_USERS
HR_USERS
EXECUTIVE_USERS
Avoid creating groups for individual users.
Apply Least Privilege
Only grant access required for a user to perform their role.
Avoid broad access unless there is a genuine business requirement.
Review Access Regularly
Periodically review:
- Security group membership
- Assigned permissions
- Business ownership
This helps maintain security and compliance.
Separate Administrative Access
Administrative users should have separate administrator groups.
Examples:
DATA_ADMINISTRATORS
SECURITY_ADMINISTRATORS
This improves governance and reduces risk.
Troubleshooting
User Cannot See Data
Check:
- The user exists in Microsoft Entra ID.
- The user belongs to the correct security group.
- The security group has been configured in CryspIQ®.
- The security group has been assigned to the required data.
User Can Log In but Sees No Results
This usually indicates that:
- The user has access to CryspIQ®.
- The user does not have access to the requested data.
Review assigned security groups and contextual security settings.
Security Group Is Not Available
Confirm:
- The group exists in Microsoft Entra ID.
- Synchronisation has completed.
- The correct group name is being searched.
Related Guides
Next Steps
After configuring access control:
- Create or update users.
- Assign users to the appropriate Microsoft Entra ID security groups.
- Configure contextual security where required.
- Validate that users can only access authorised data.
CryspIQ® automatically applies security controls whenever users query, view or consume data.