User Management
This guide will walk you through the steps to assign roles to user accounts in Crysp IQ.
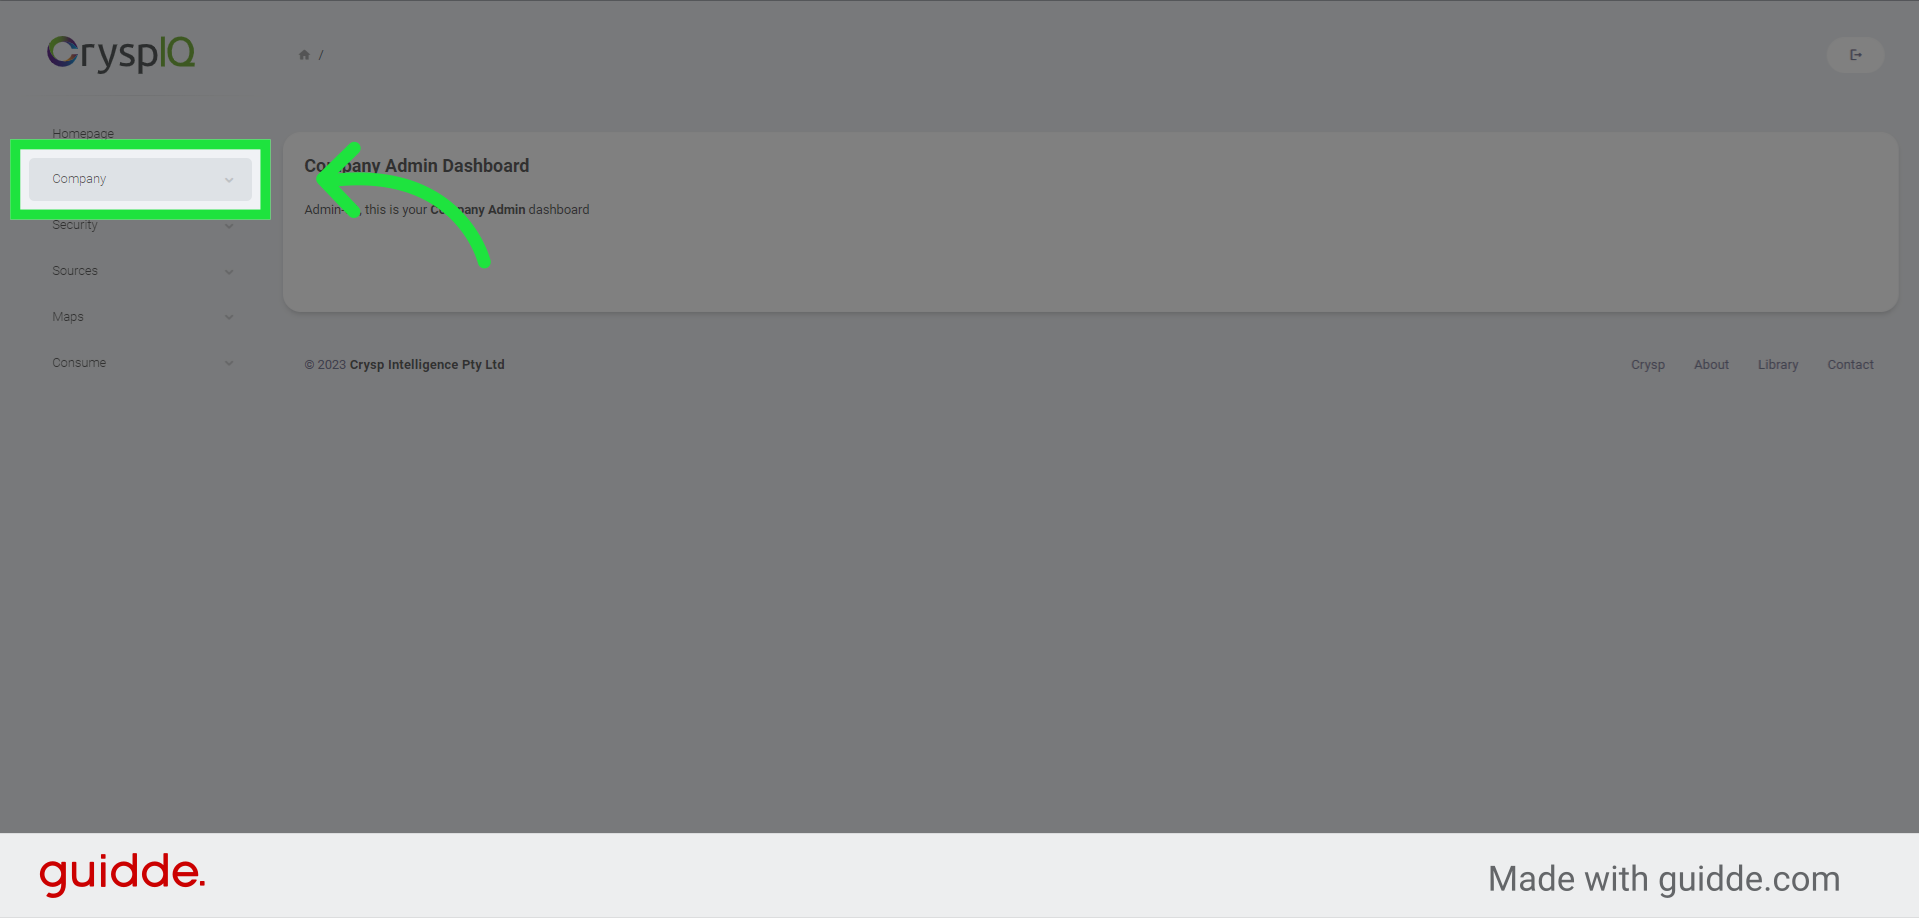
1. Click "Company"
Start by clicking on the "Company" menu item.
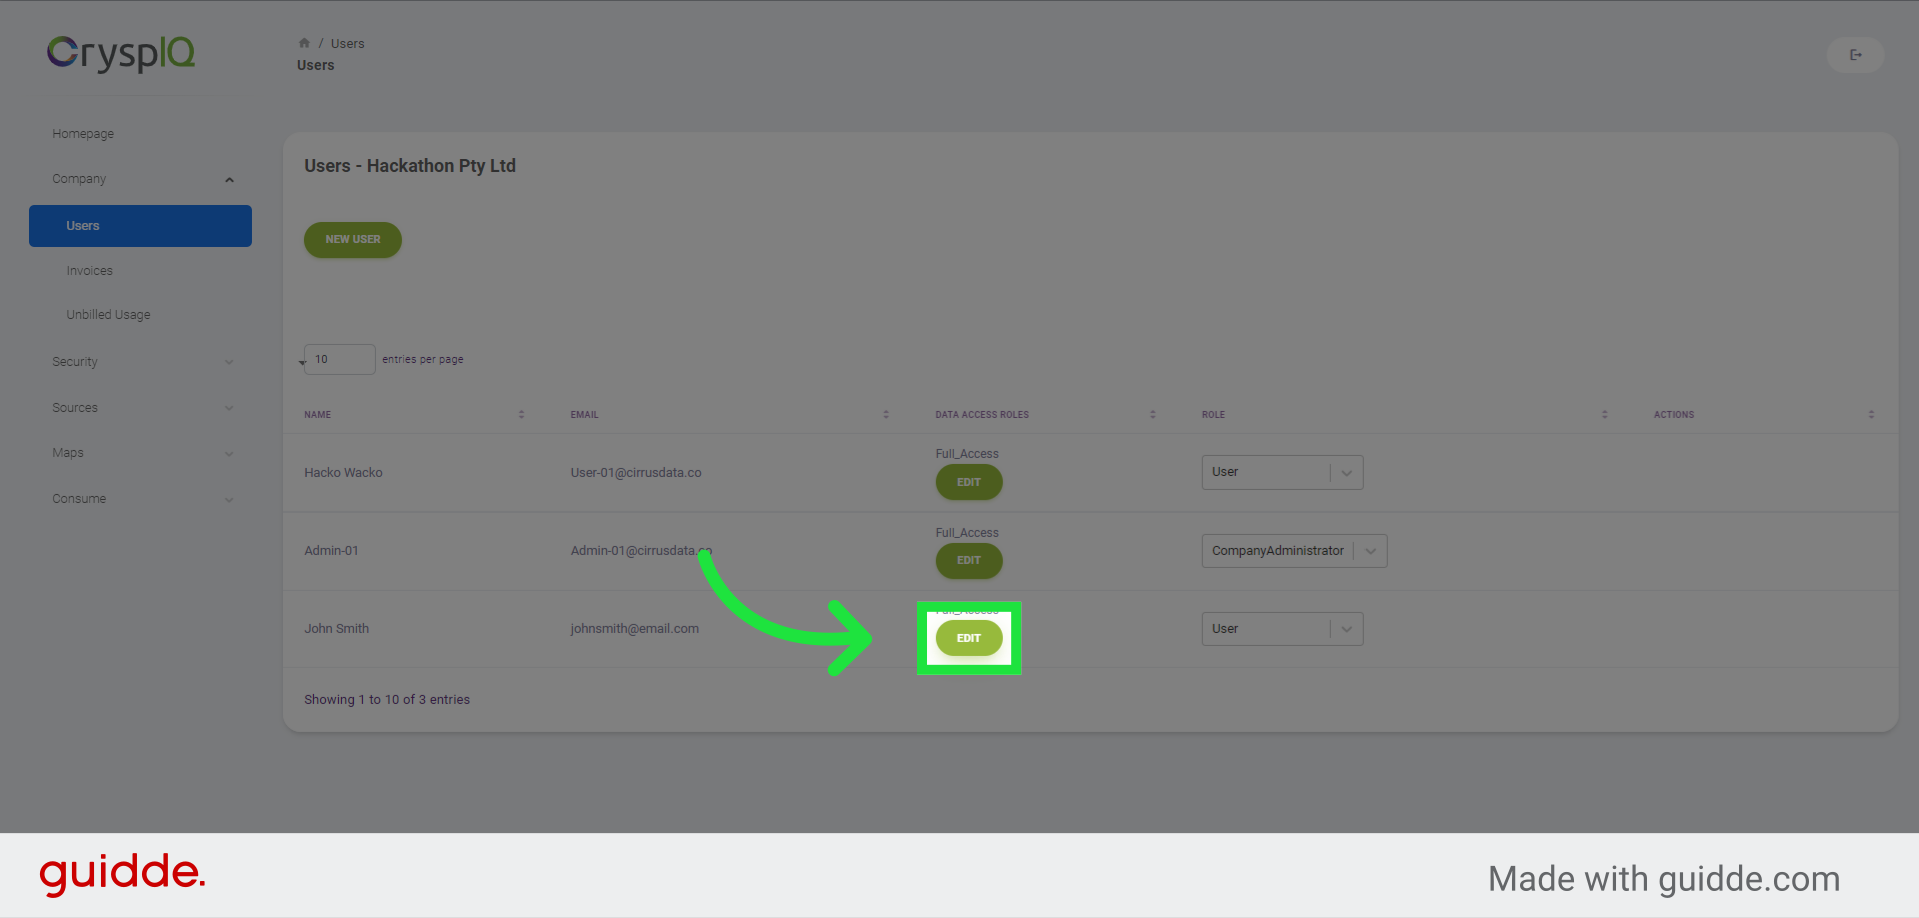
2. Click "Users"
Then select the "Users" option from the menu.

3. Click "Edit"
Choose the "Edit" option for the user you want to modify.
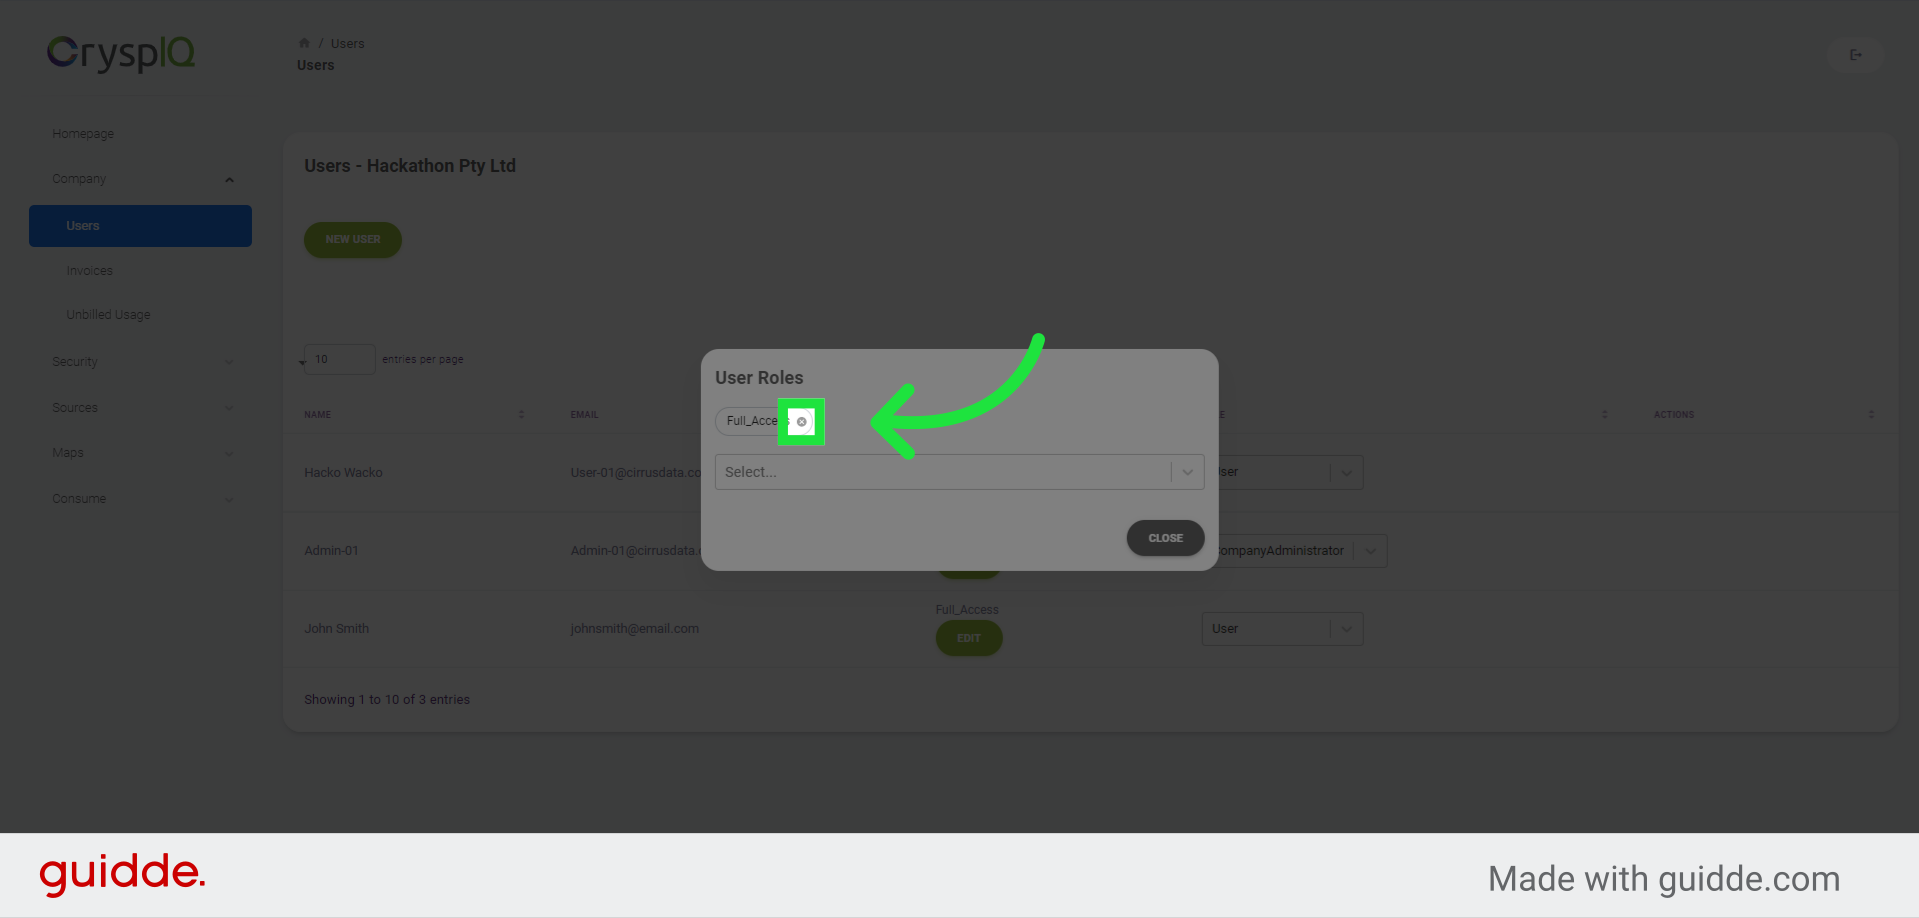
4. Remove a role assignment
In this example, we need to remove the "Full Access" role from the user "JOhn Smith". To remove the role, click on the "x" in the role oval button.
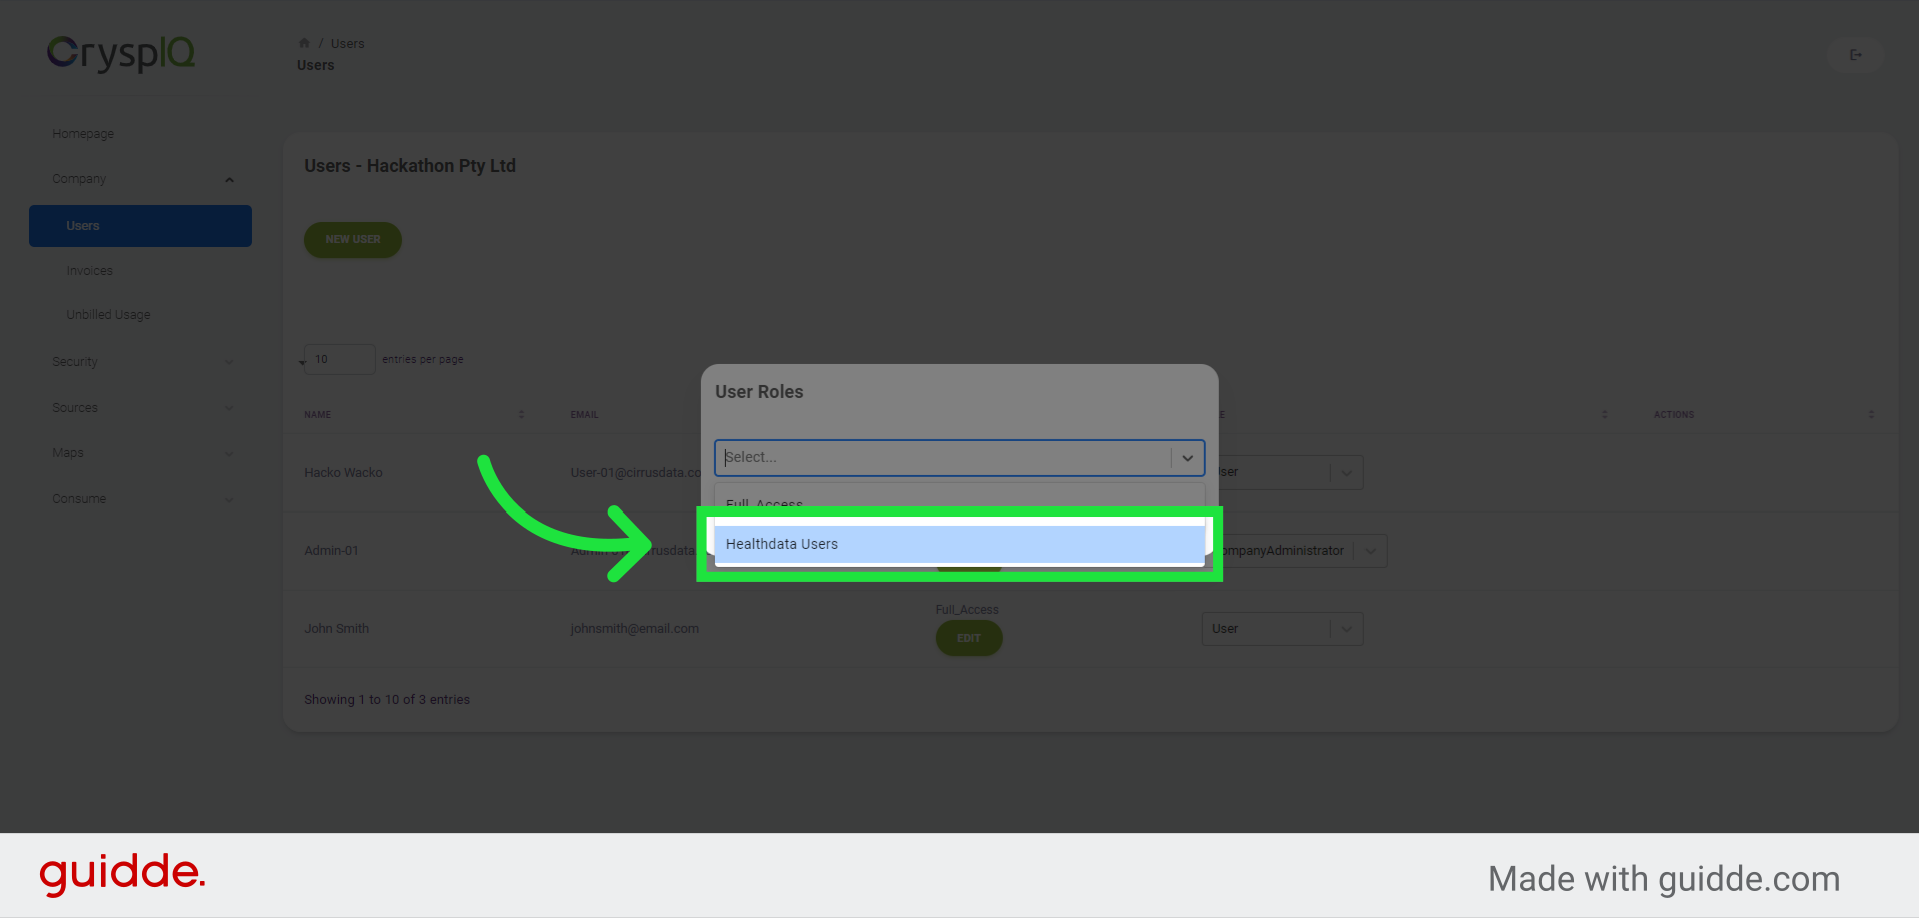
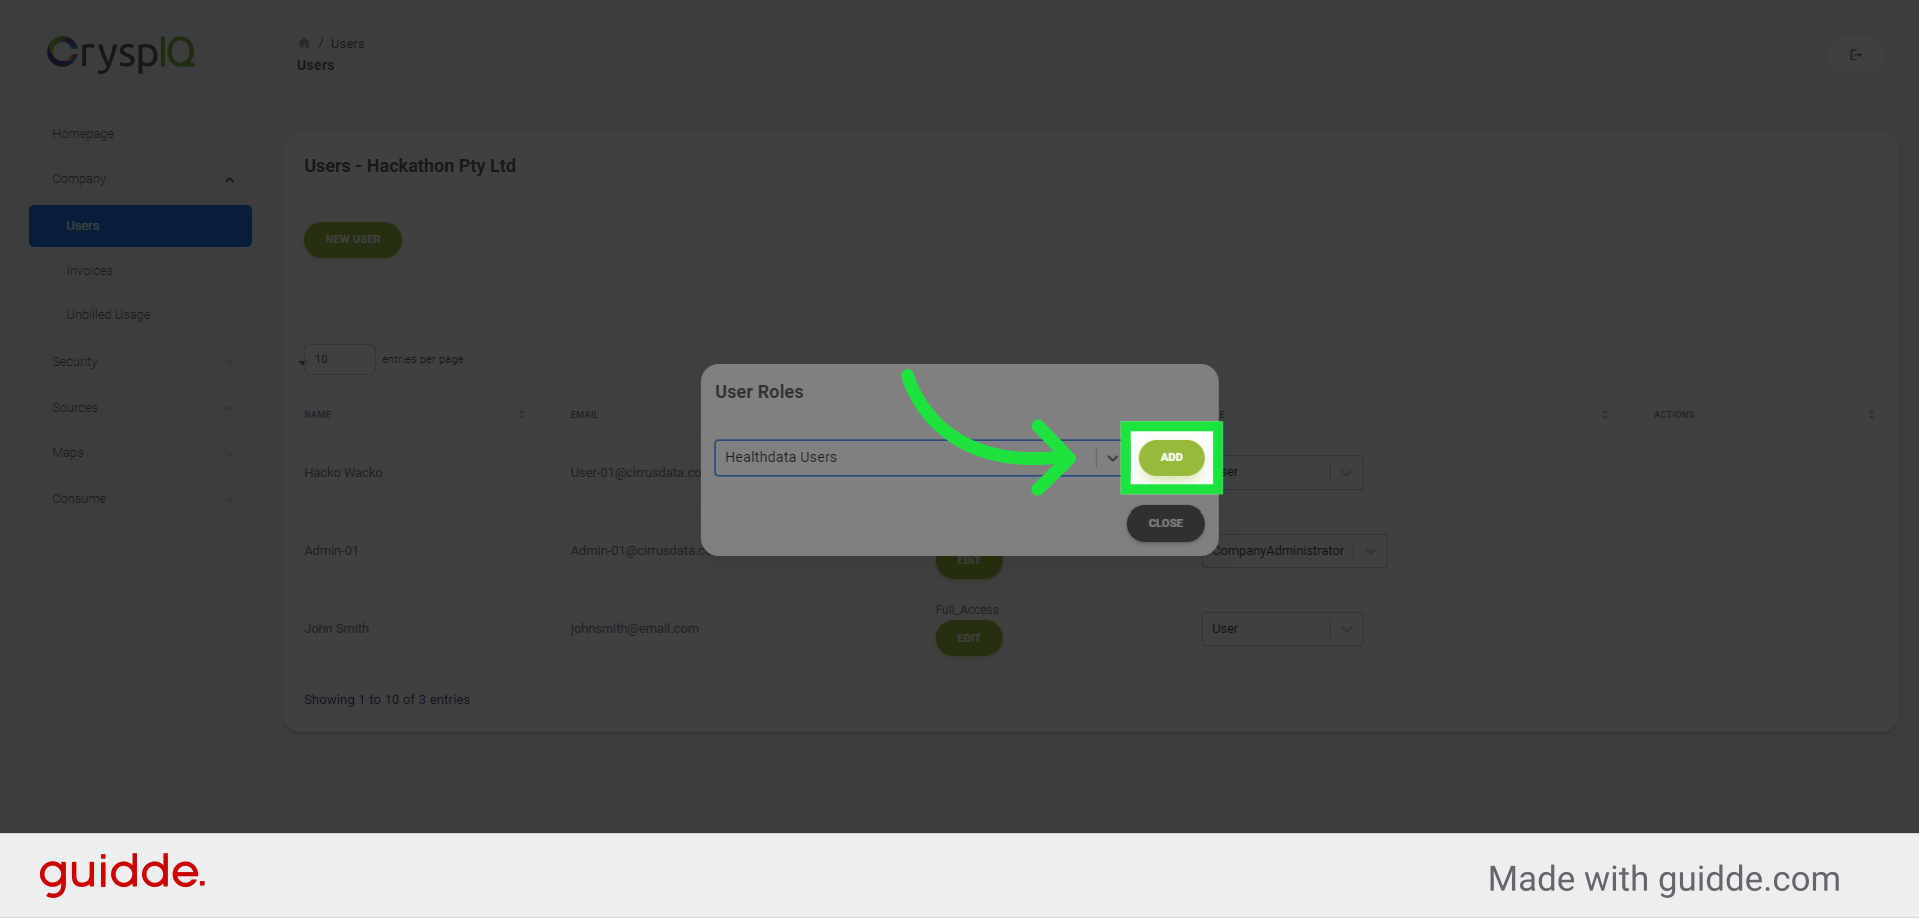
5. Add a role assignment
To add a role assignment, we will select the "Healthcare users" from the dropdown to assign this role to "John Smith"
6. Click "Add"
Click on the "Add" button.
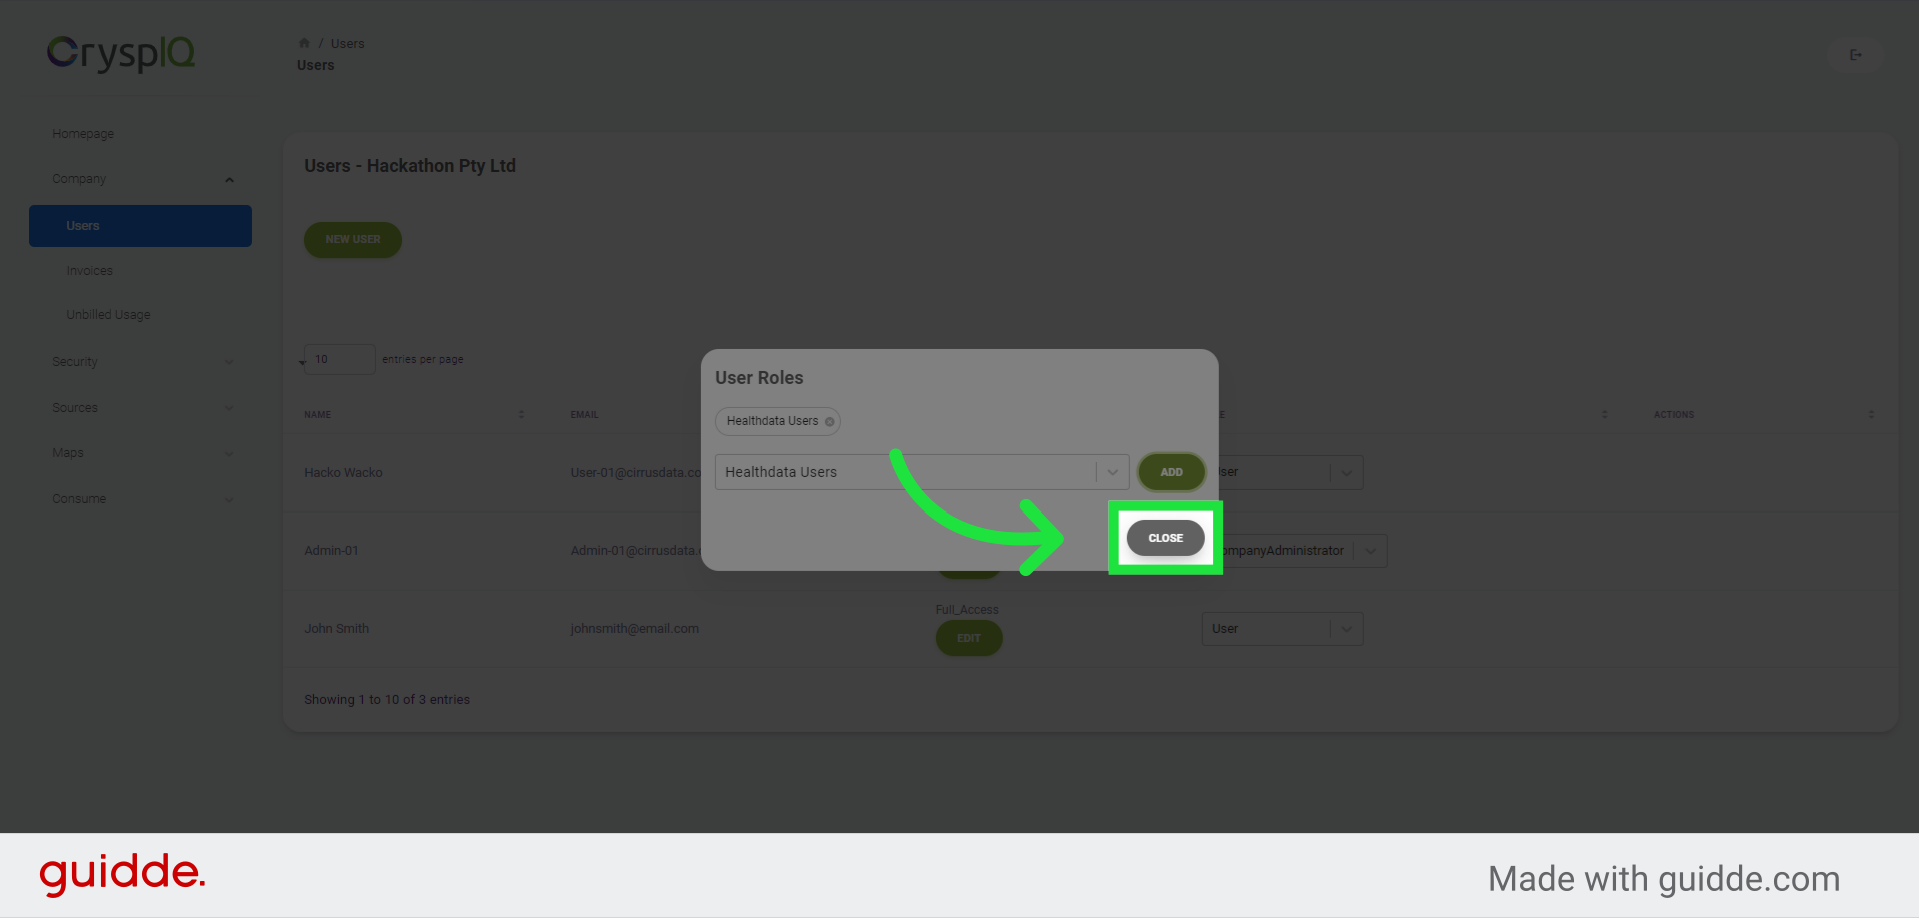
7. Click "Close"
Click on the "Close" button to exit the role management window.
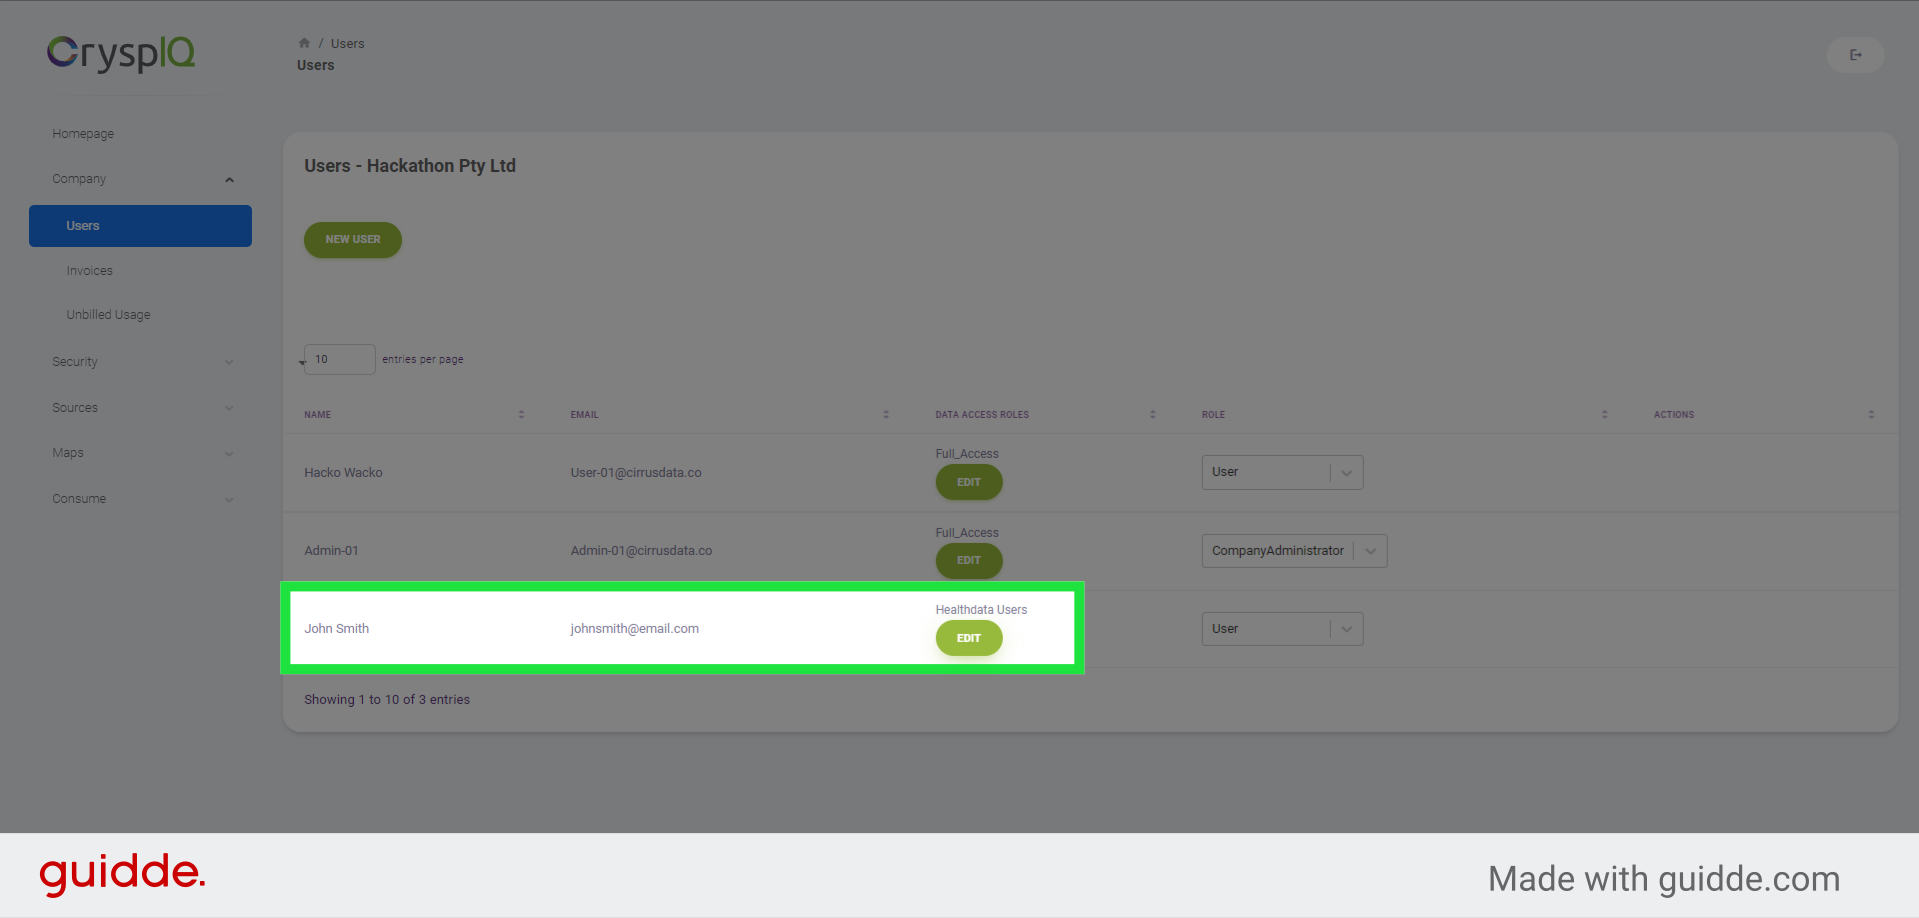
8. View the new role assignment
You can now see that the role "Healthcare users" is assigned to John Smith in the User Management page.
In this guide, we covered the process of managing user roles in Crysp IQ.